
Integrating Sigrid CI into your continuous integration pipeline
This documentation covers cloud-based Sigrid. For on-premise Sigrid, refer to the section about on-premise analysis configuration.
This guide explains how to integrate Sigrid into your continuous integration pipeline. Make sure you have also read the general Sigrid CI documentation before starting this guide. This document describes a generic integration, but the aforementioned page also contains some specific instructions for integrating Sigrid CI with commonly used development platforms.
Prerequisites
- You have a Sigrid user account.
- You have created an authentication token for using Sigrid CI.
- Python 3.9 or higher needs to be available in the CI environment. The client scripts for Sigrid CI are based on Python.
- The examples assume Git is available in the CI environment.
On-boarding your system to Sigrid
On-boarding is done automatically when you first run Sigrid CI. As long as you have a valid token, you will receive the message system has been on-boarded to Sigrid. Subsequent runs will then be visible in both your CI environment and sigrid-says.com.
Configuration
Step 1: Configure Sigrid credentials to environment variables
Sigrid CI reads your Sigrid authentication token from an environment variable called SIGRID_CI_TOKEN. You can define this environment variable in the CI user’s ~/.bashrc, though some platforms also allow you to define environment variables using a graphical interface.
The following example shows an example of the environment variables being added to ~/.bashrc:
# Leave existing contents of the file as they were, and add these lines
export SIGRID_CI_TOKEN="EHHtLKgPQH3XfjNZfmKqABUR"
Step 2: Download the Sigrid CI client scripts and make them available to your Sigrid CI environment
Sigrid CI consists of a number of Python-based client scripts, that interact with Sigrid in order to analyze your project’s source code and provide feedback based on the results. These client scripts need to be available to the CI environment, in order to call the scripts from the CI pipeline.
The scripts can be obtained by either cloning or downloading this repository, and moving the sigridci directory to a location that is available to the CI environment.
Step 3: Add Sigrid CI to your project’s CI pipeline
Next, you need to edit your project’s CI configuration, in order to add Sigrid CI as an extra step. The exact location and syntax of the CI configuration will depend on the platform you’re using, but in general the CI configuration consists of shell script invocations that are organized into separate steps.
The following example shows a GitLab CI configuration file for a Java-based project, with Sigrid CI added as the last step:
stages:
- build
- test
- report

compile:
  stage: build
  script:
    - mvn clean compile

unittests:
  stage: test
  script:
    - mvn test surefire-report:report

sigridci:
  stage: report
  script:
    - git clone https://github.com/Software-Improvement-Group/sigridci.git sigridci
    - ./sigridci/sigridci/sigridci.py --customer <example_customer_name> --system <example_system_name> --source .
  allow_failure: true
  except:
    - master

sigridpublish:
  stage: report
  script:
    - git clone https://github.com/Software-Improvement-Group/sigridci.git sigridci
    - ./sigridci/sigridci/sigridci.py --customer <example_customer_name> --system <example_system_name> --source . --publish
  allow_failure: true
  only:
    - master
This configures two additional build steps:
- The
sigridcistep provides Sigrid feedback for pull request. This step is configured to run for every branch except the main/master branch. - The
sigridpublishstep publishes project snapshots to sigrid-says.com. This step only runs for the main/master branch.
Security note: This example downloads the Sigrid CI client scripts directly from GitHub. That might be acceptable for some projects, and is in fact increasingly common. However, some projects might not allow this as part of their security policy. In those cases, you can simply download the sigridci directory in this repository, and make it available to your runners (either by placing the scripts in a known location, or packaging them into a Docker container).
The relevant command that starts Sigrid CI is the call to the sigridci.py script, which starts the Sigrid CI analysis. The scripts supports a number of arguments that you can use to configure your Sigrid CI run. The scripts and its command line interface are explained in using the Sigrid CI client script.
Finally, note that you need to perform this step for every project where you wish to use Sigrid CI.
Optional: change the analysis scope configuration
Sigrid will try to automatically detect the technologies you use, the component structure, and files/directories that should be excluded from the analysis. You can override the default configuration by creating a file called sigrid.yaml and adding it to the root of your repository. You can read more about the various options for custom configuration in the configuration file documentation.
Usage
Once you have configured the integration, Sigrid CI will show up as a new step in your CI pipeline. The step will succeed if the code quality meets the specified target, and will fail otherwise.

Sigrid CI provides multiple levels of feedback. The first and fastest type of feedback is directly produced in the CI output, as shown in the following screenshot:
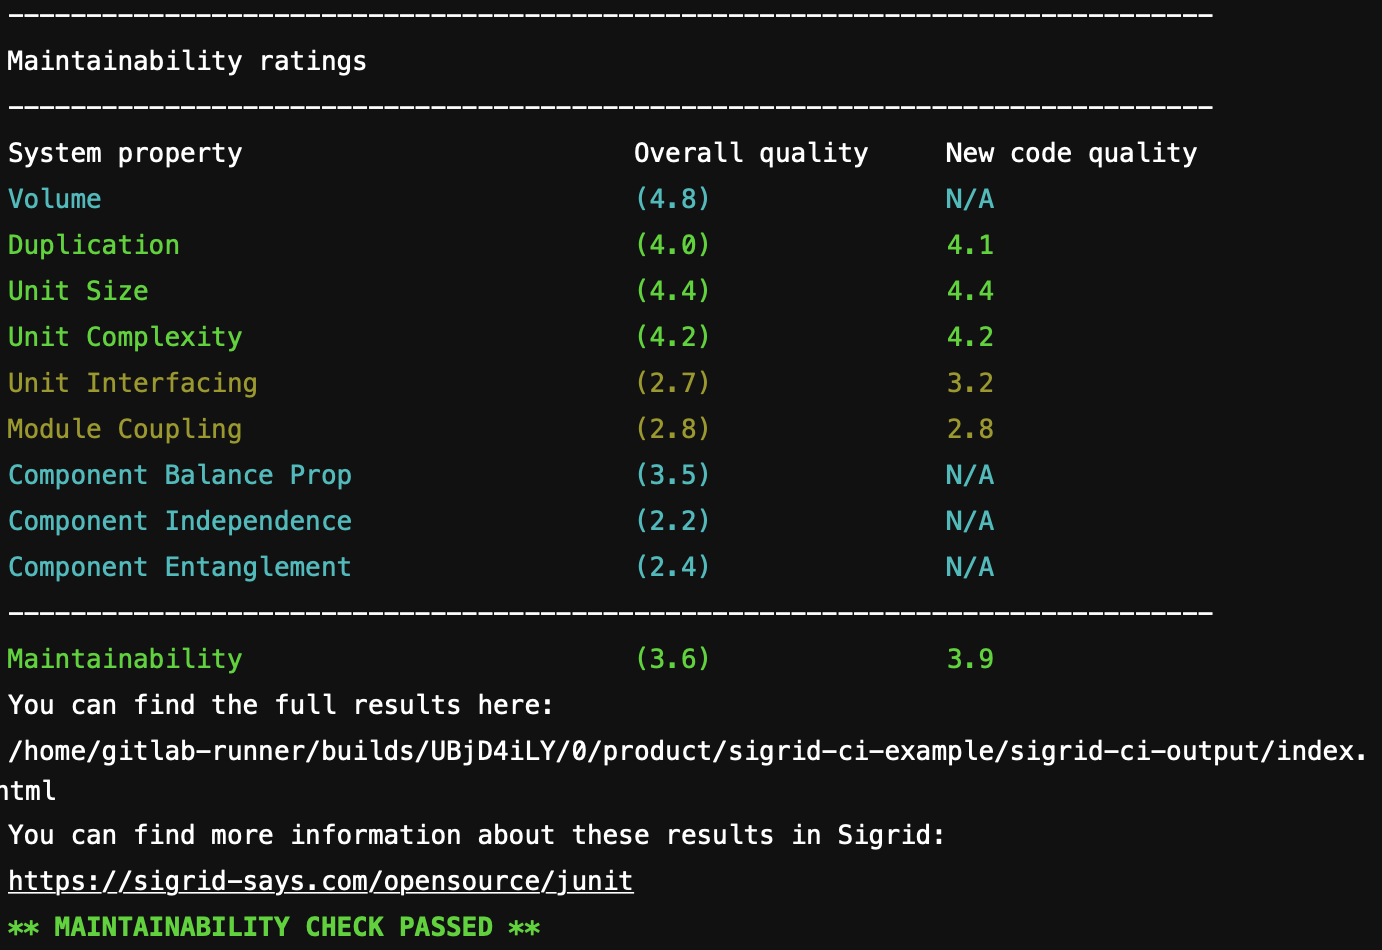
The output consists of the following:
- A list of refactoring candidates that were introduced in your merge request. This allows you to understand what quality issues you caused, which in turn allows you to fix them quickly. Note that quality is obviously important, but you are not expected to always fix every single issue. As long as you meet the target, it’s fine.
- An overview of all ratings, compared against the system as a whole. This allows you to check if your changes improved the system, or accidentally made things worse.
- The final conclusion on whether your changes and merge request meet the quality target.
Contact and support
Feel free to contact SIG’s support team for any questions or issues you may have after reading this documentation or when using Sigrid.