

You can use these integrations to check Sigrid findings as you work on your code, triage findings, and export findings to your issue tracker if you're not able to fix them right away.
Have you tried them? We'd love your feedback: Share it in our short survey.
Sigrid extension for Visual Studio Code
This extension lets you view and manage findings in Visual Studio Code.
SIG offers two types of IDE integration:
Sigrid Axis is the integration for AI coding assistants. It lets your AI coding assistant find quality issues in your code and fix them. It also gives an immediate feedback loop where you receive quality feedback as you’re working on the code.
The Visual Studio Code extension is an IDE extension “for humans”. It focuses on viewing and managing the findings from Sigrid Core within your IDE. In particular, it lets you do the following:
- Navigate Sigrid findings in your IDE. This allows for faster and more familiar code navigation than having to navigate your code and findings in Sigrid itself.
- Show Sigrid findings for the code you’re currently working on. This makes it easier to take those findings into consideration and apply the boy scout rule when working on those files.
- Triage findings. Changing a finding’s status and adding remarks directly from your IDE makes it faster and more convenient when you need quickly triage large numbers of findings.
- Fix findings with AI. Send a finding directly to Claude Code or GitHub Copilot to have it fixed for you, without leaving the findings list.
- Jump back-and-forth between Sigrid and your IDE. When needed, you can quickly jump from the finding information in your IDE to viewing the finding details in Sigrid.
- Create Jira or Azure DevOps issues from findings. Narrow down a large list of findings by risk level or status, or search across all findings using the search bar.
Installing the extension
You can install the Sigrid extension directly from the Visual Studio Code Marketplace.
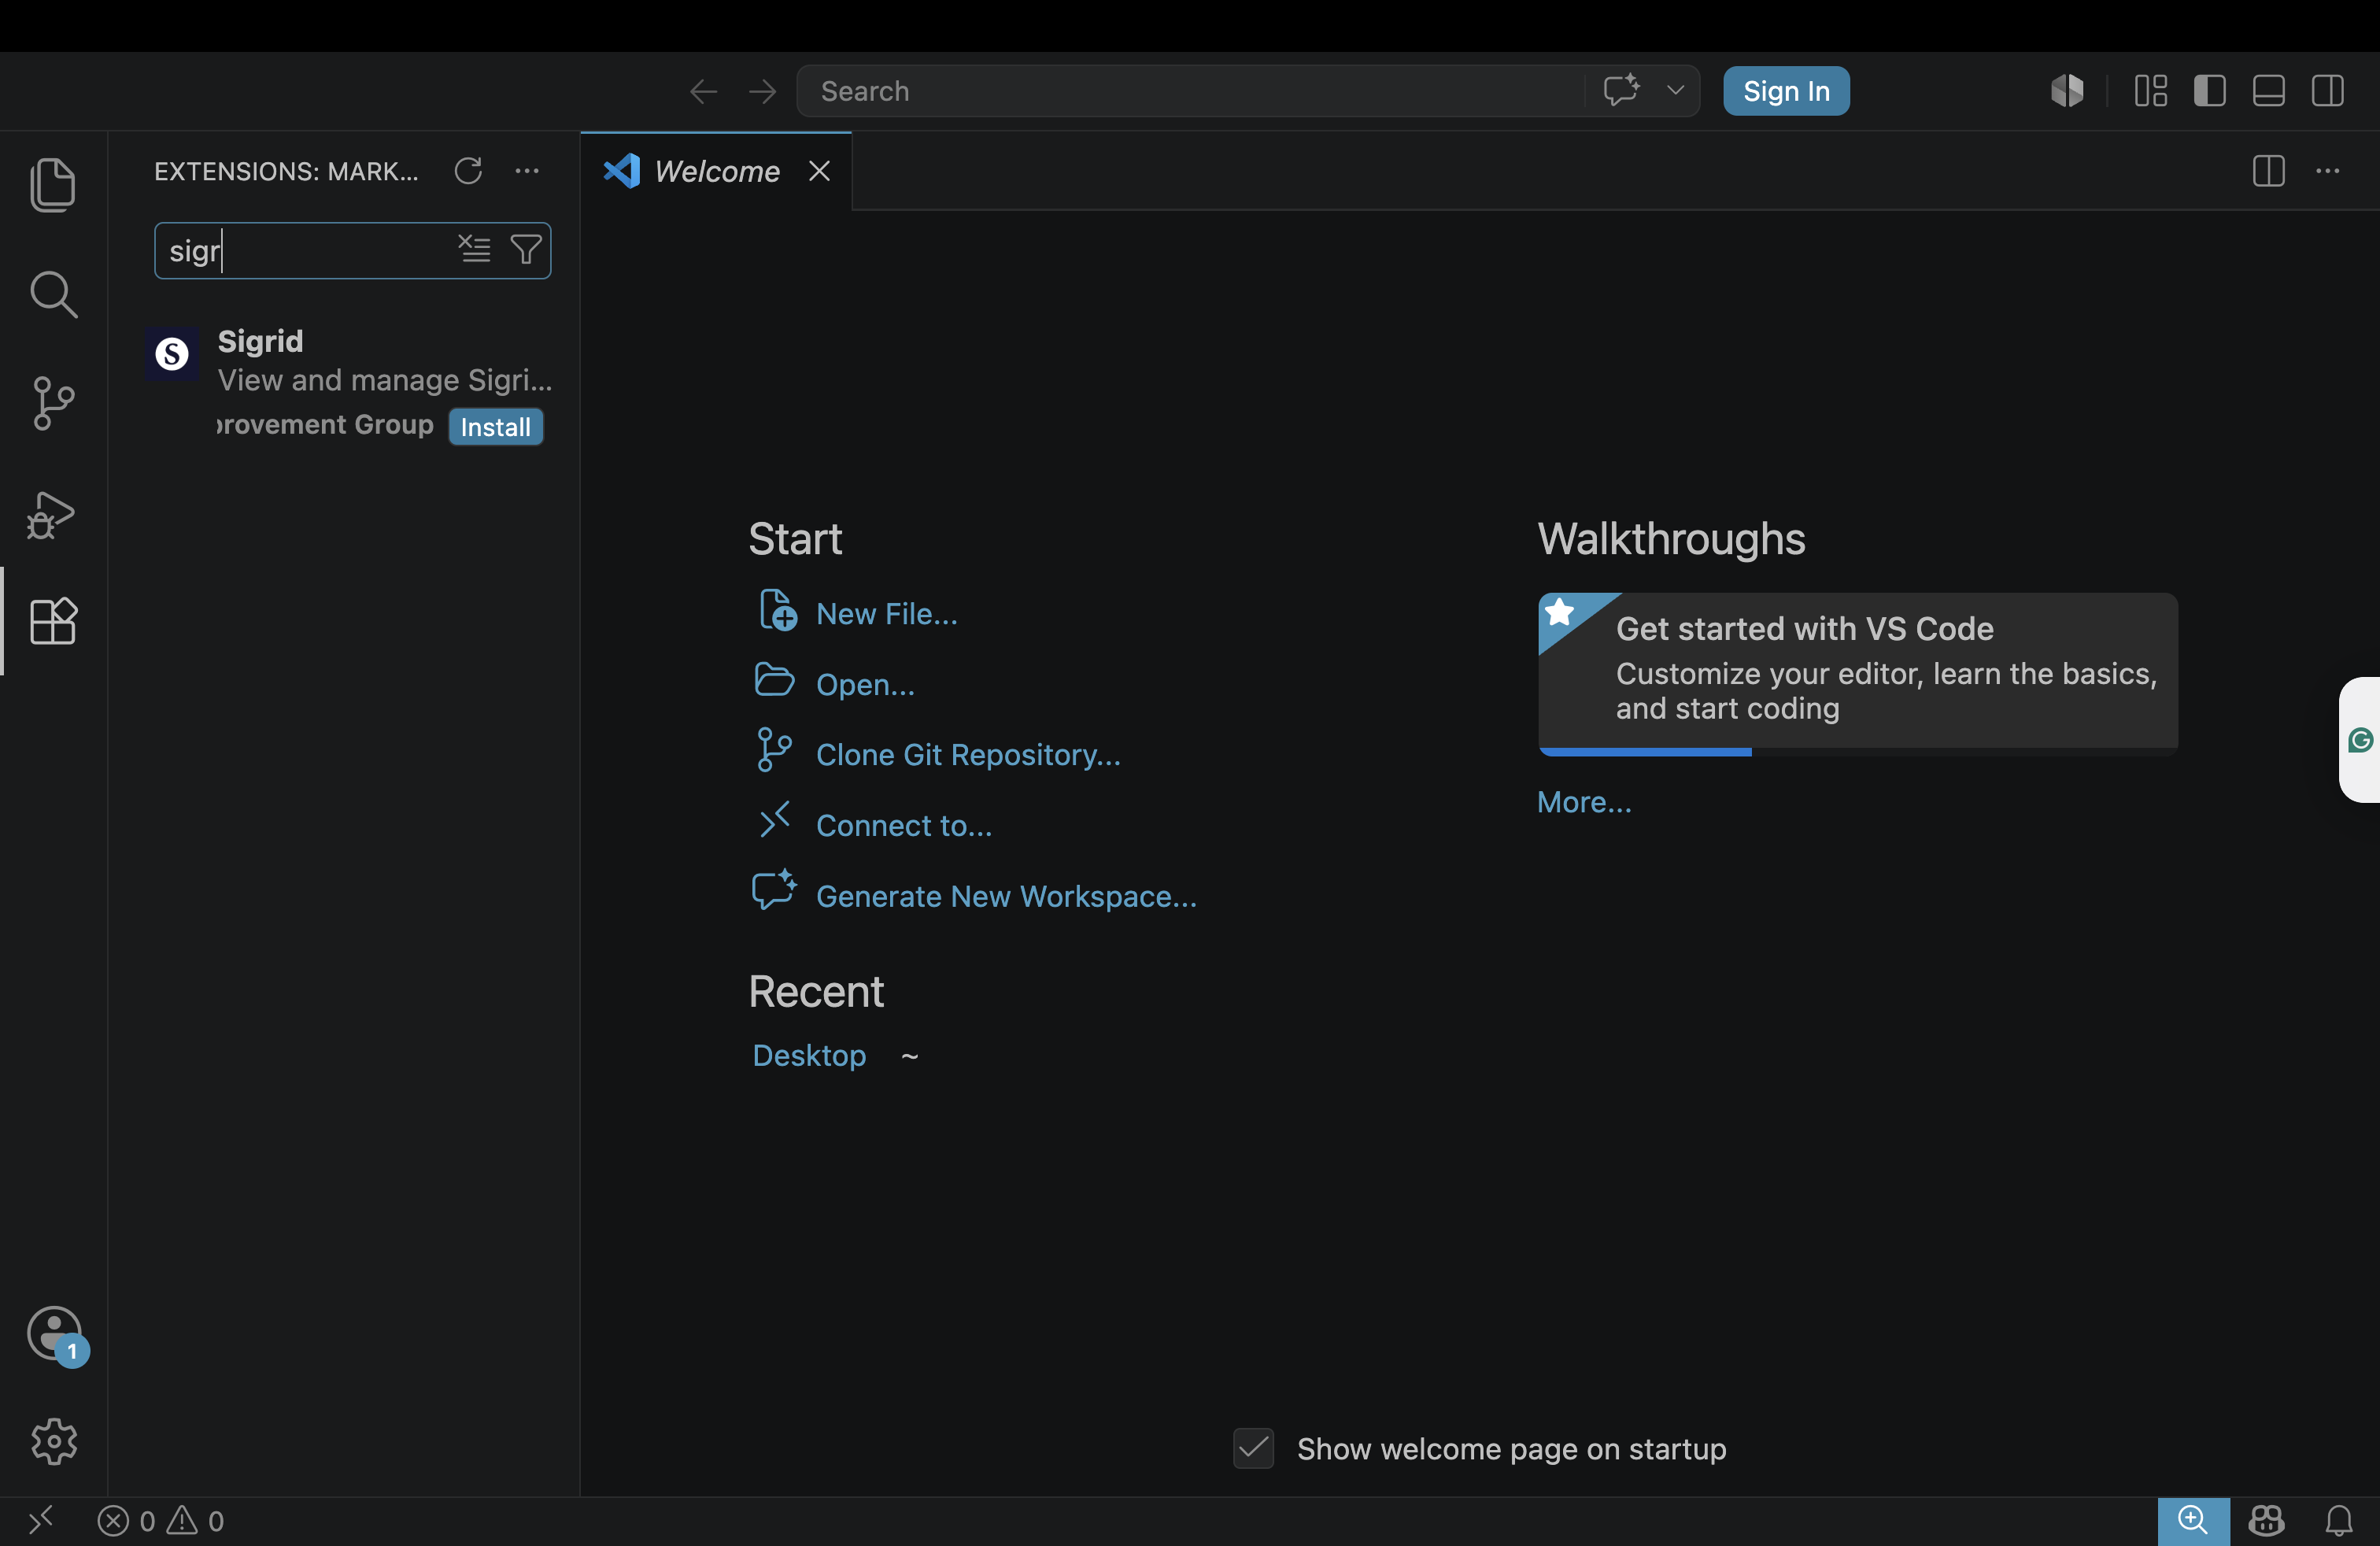
- Open Visual Studio Code.
- Click the Extensions icon in the left-hand menu.
- Search for “Sigrid” in the search bar.
- Click Install.
Alternatively, you can install it directly from the Sigrid extension page in the Visual Studio Code Marketplace.
Configuring the extension
Before you can use the extension, you will first need to provide your Sigrid credentials.
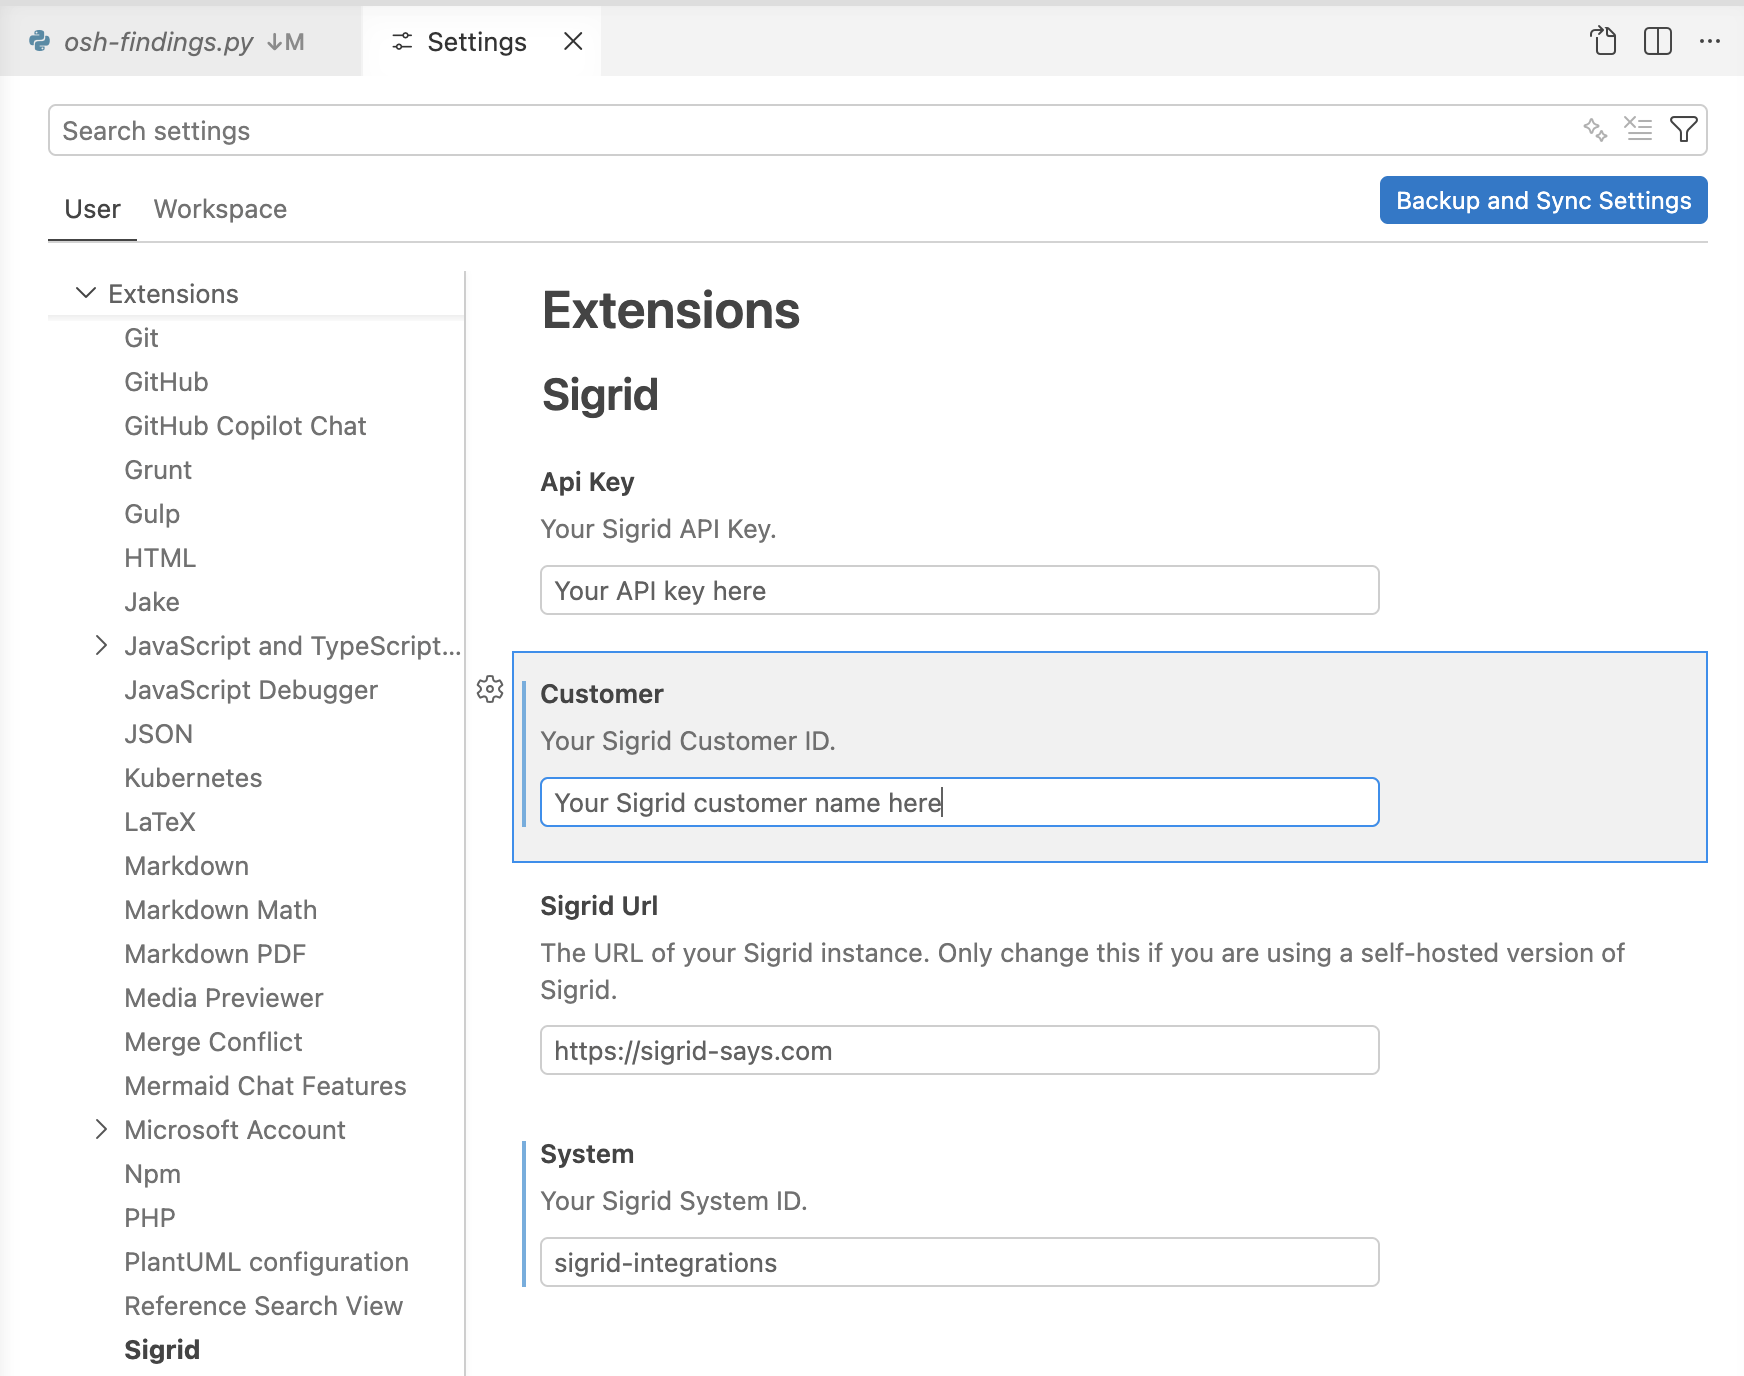
- Open the settings menu in Visual Studio Code.
- In the list of settings, select “Extensions”.
- In the extensions sub-menu, select “Sigrid”.
- Enter your Sigrid customer name and system name.
- You will also need to add your authentication token.
- If you are using on-premise Sigrid, you will also need to enter your on-premise URL. If you are using cloud-based Sigrid, this is not needed.
Using the extension
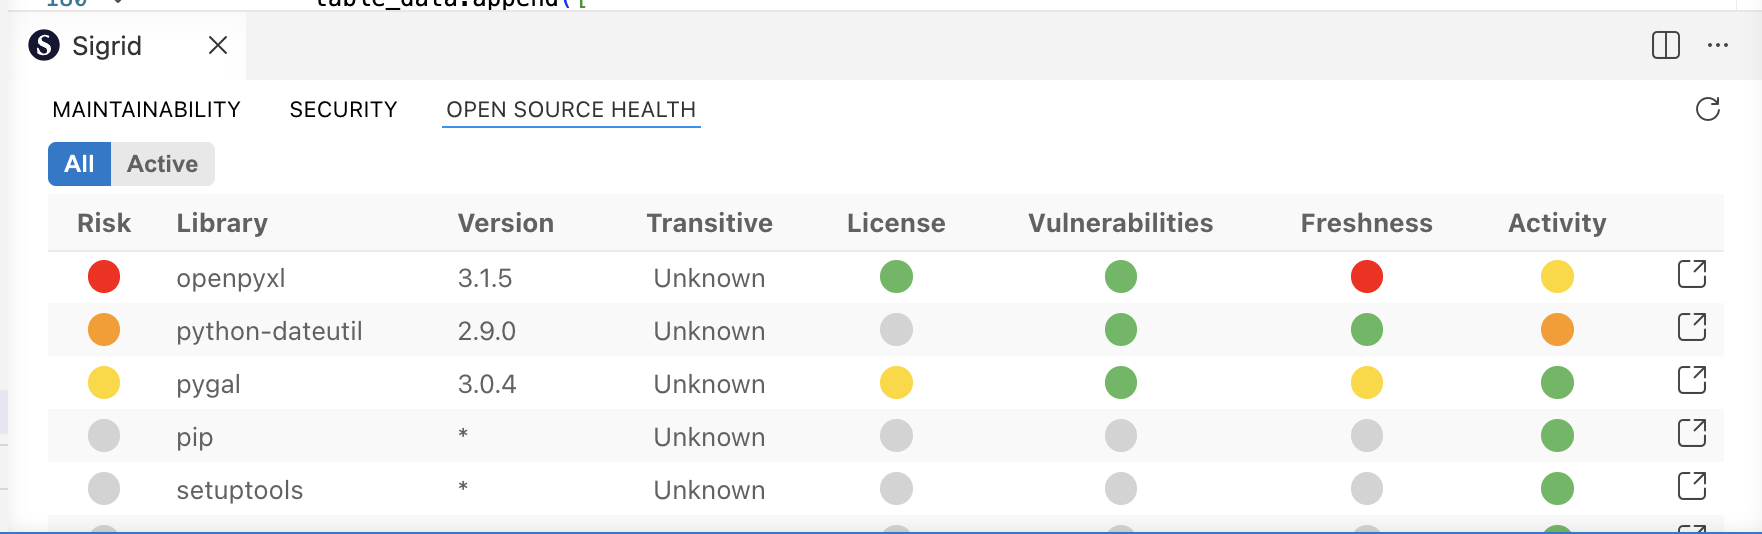
The Sigrid extension is not visible by default. You can open it using the ”> Sigrid: Show findings” command. When opened, the Sigrid extension contains multiple tabs, one for each Sigrid capability. Before findings load, the extension checks whether the configured system exists in Sigrid and shows its status (checking, not onboarded, onboarding in progress). You can trigger a manual refresh if needed.
If the system isn’t onboarded yet, the panel offers to onboard it directly — no need to leave VS Code. Triggering this zips your workspace and uploads it to Sigrid for onboarding.
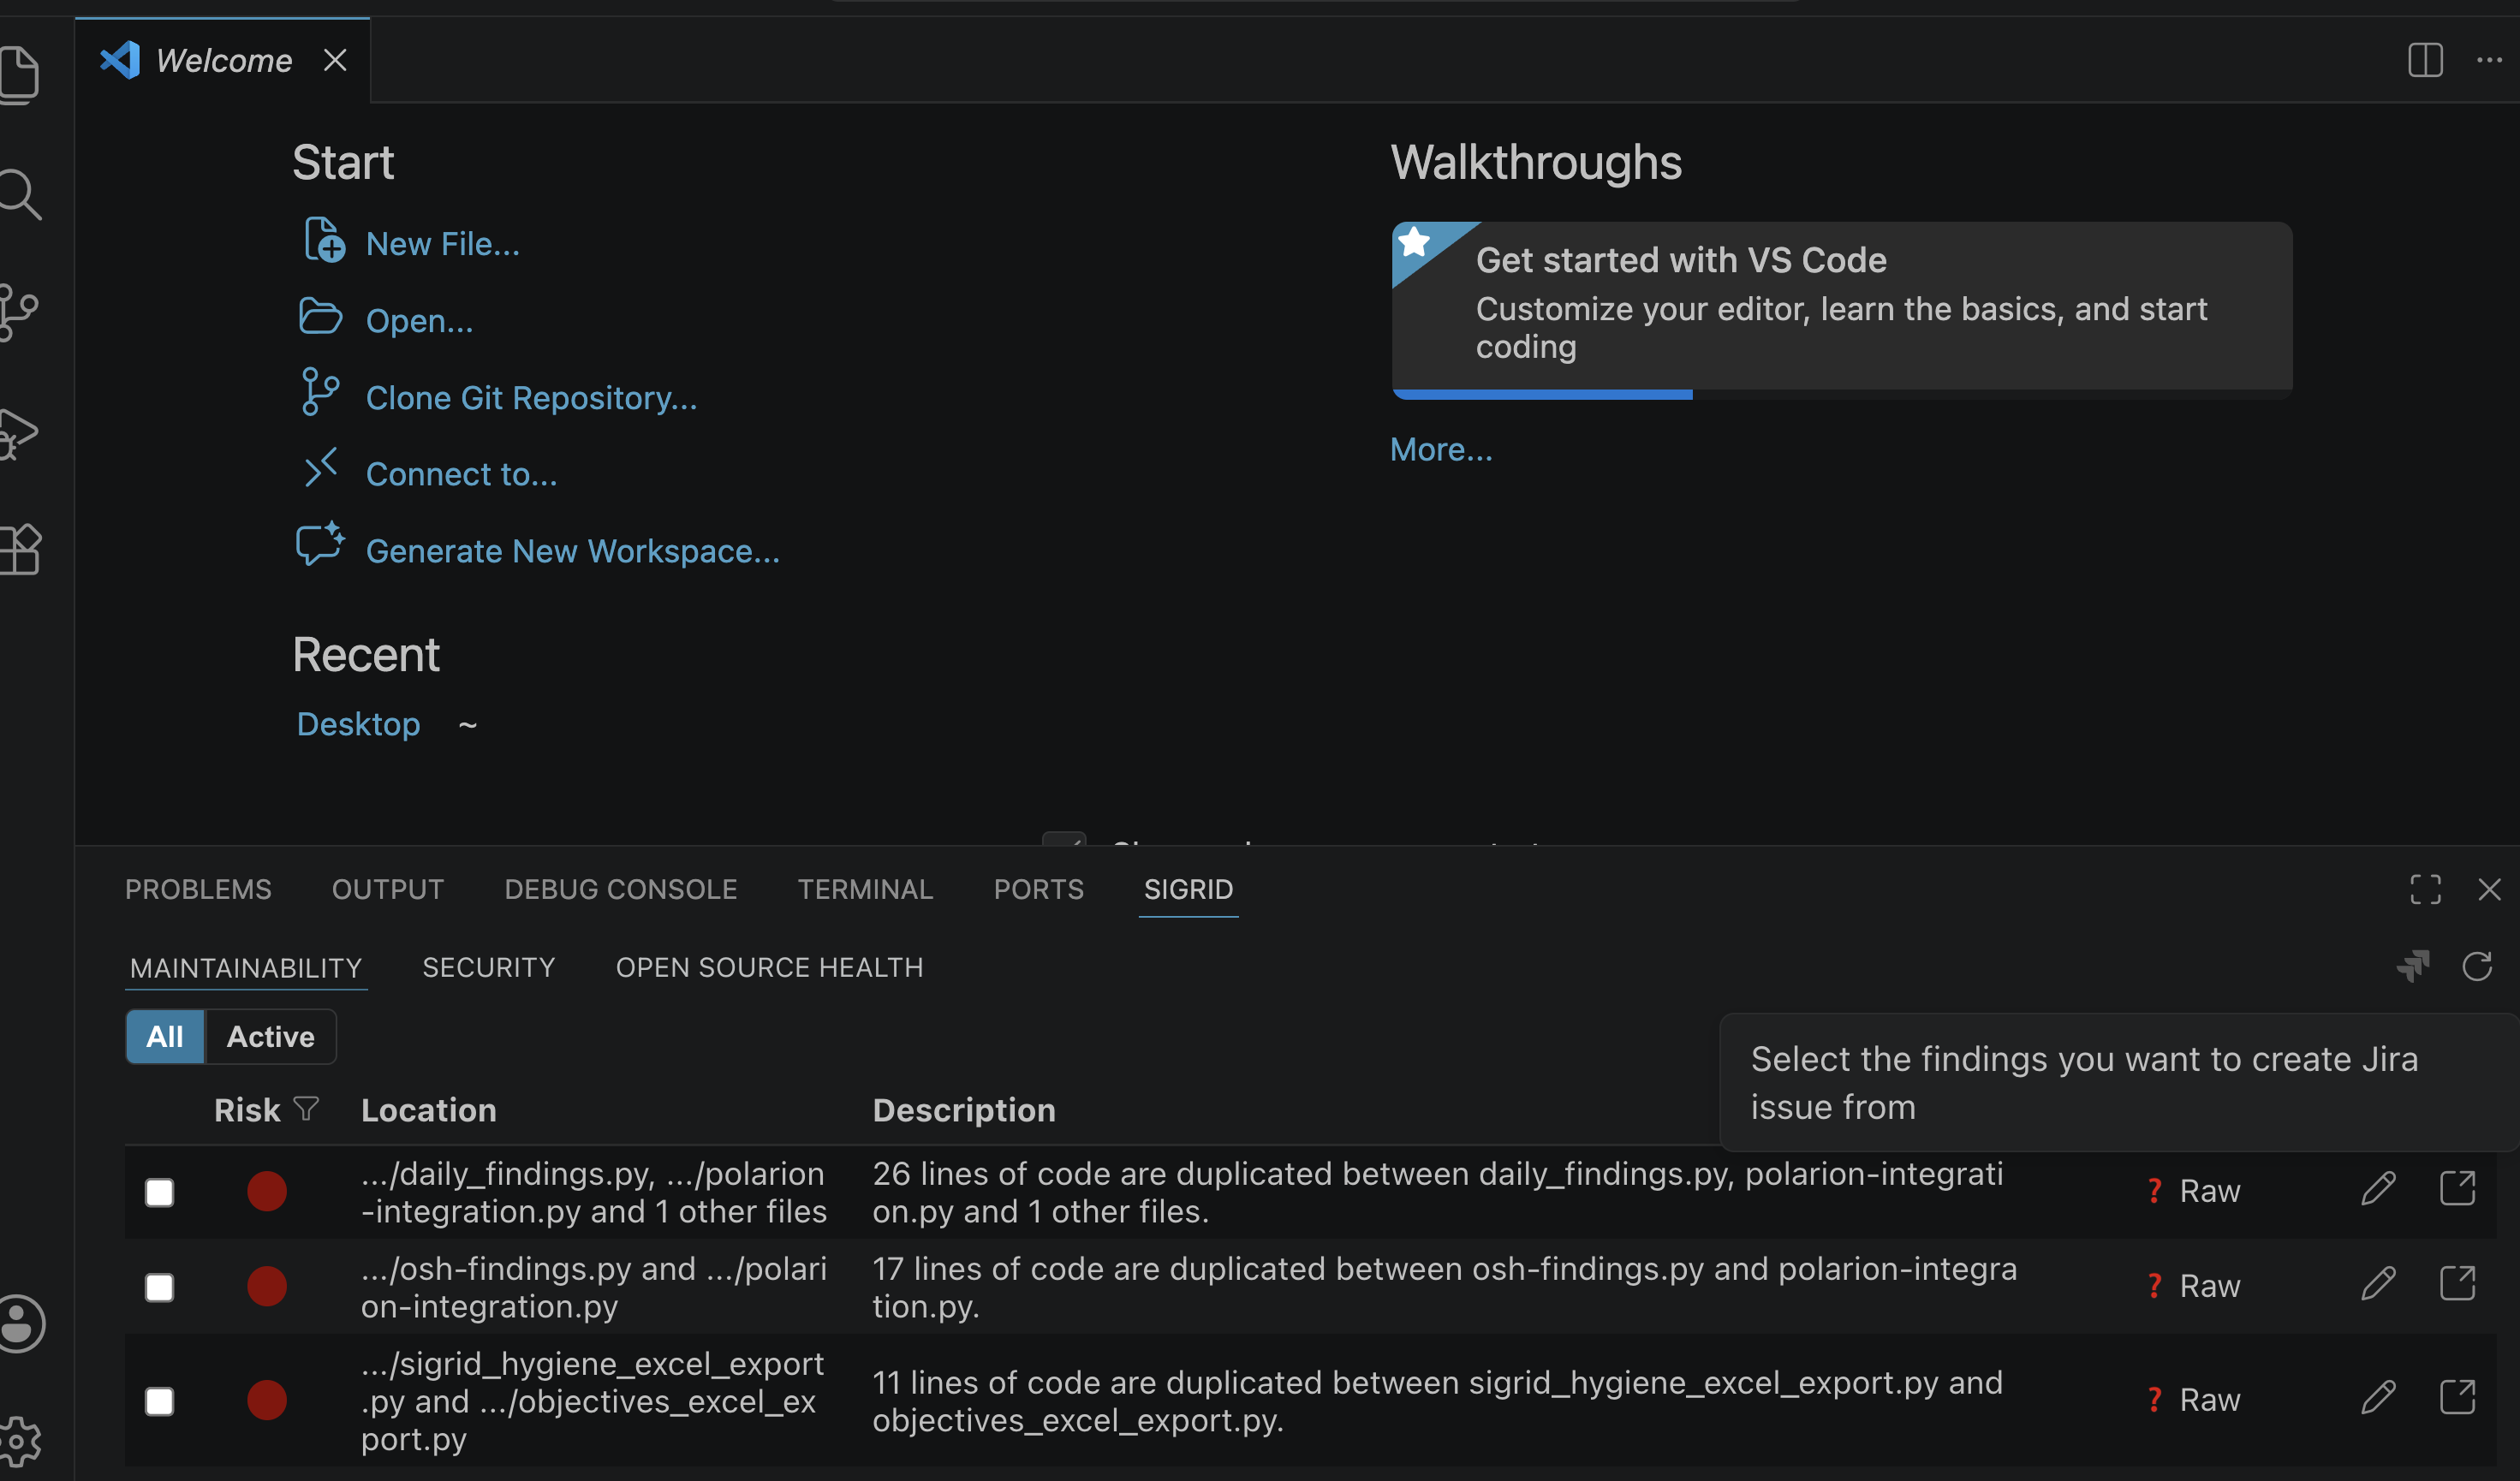
- Double-clicking on a finding will navigate you to the location of that finding in the code.
- Using the “open” icon in the right-hand side will open the corresponding Sigrid finding detail page in your default browser.
- The pencil icon allows you to edit a finding’s status and add remarks.
Filtering and searching findings
When working with a large number of findings it can be hard to focus on what matters most. You can narrow down the findings list using the filter controls and the search bar at the top of the panel.
To filter by risk level, click the filter icon (▽) next to the Risk column header. A dropdown appears with the risk levels available in your current findings — for example Very High, High, or Medium. Only options that exist in the active findings table are shown. Select one or more risk levels to show only findings that match. Deselect to remove the filter.
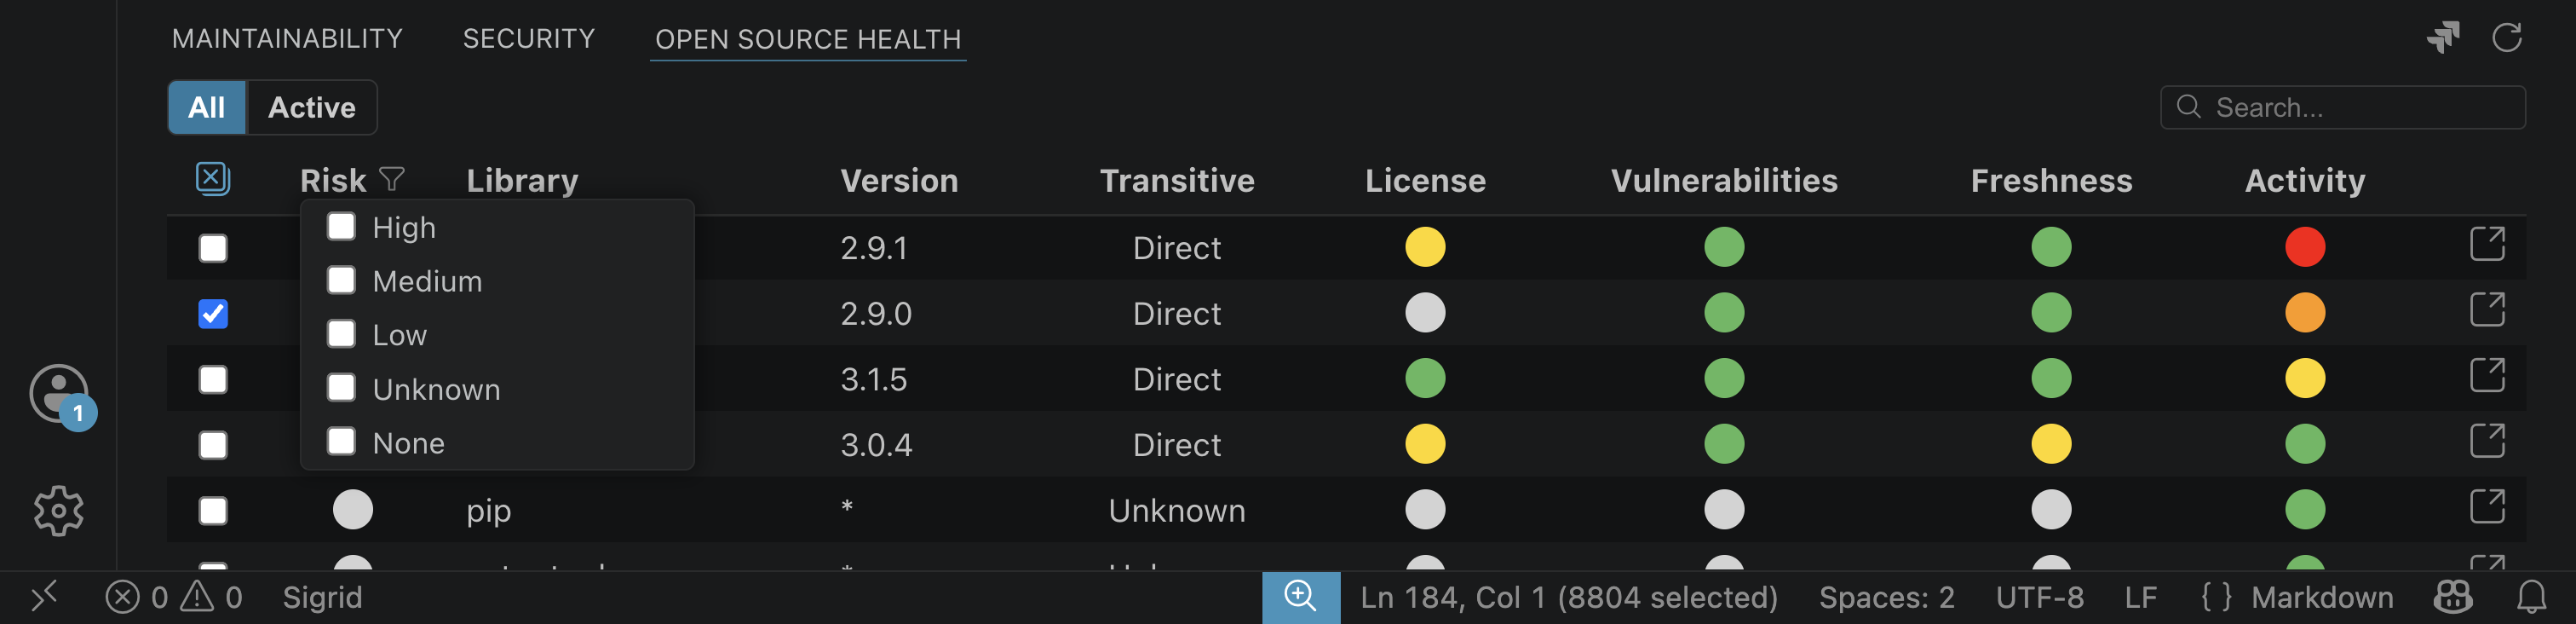
To filter by status, click the filter icon (▽) next to the Status column header. A dropdown appears with the available statuses, such as Raw, Accepted, and False Positive.
To search across all findings, use the search bar in the top-right corner of the panel. The list updates in real time as you type.You can combine risk, status, and search filters at the same time.
Fixing findings with AI
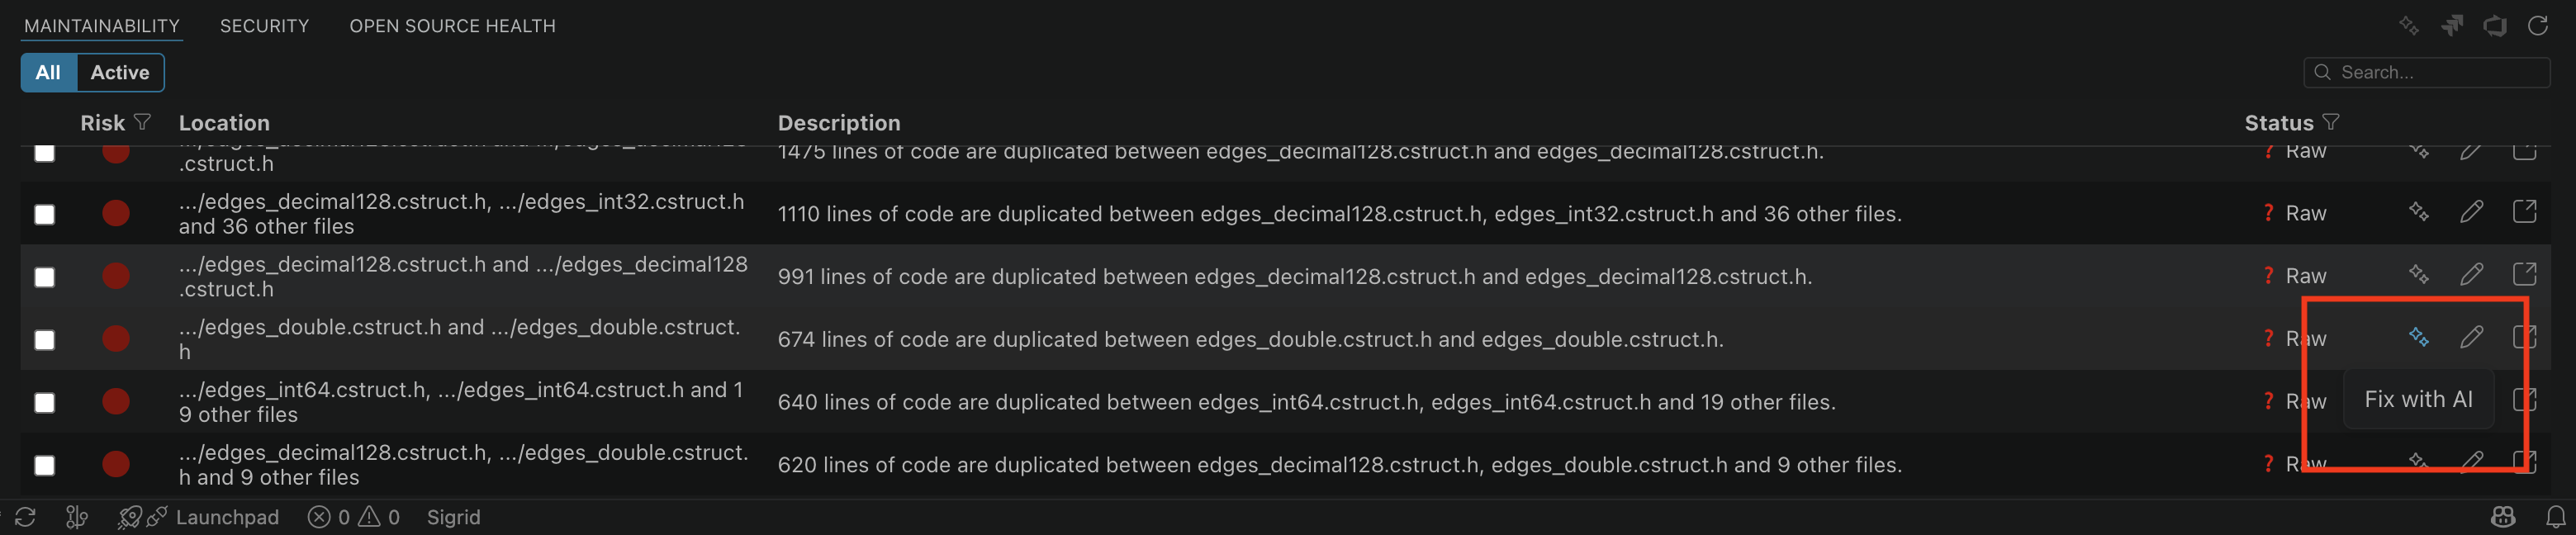
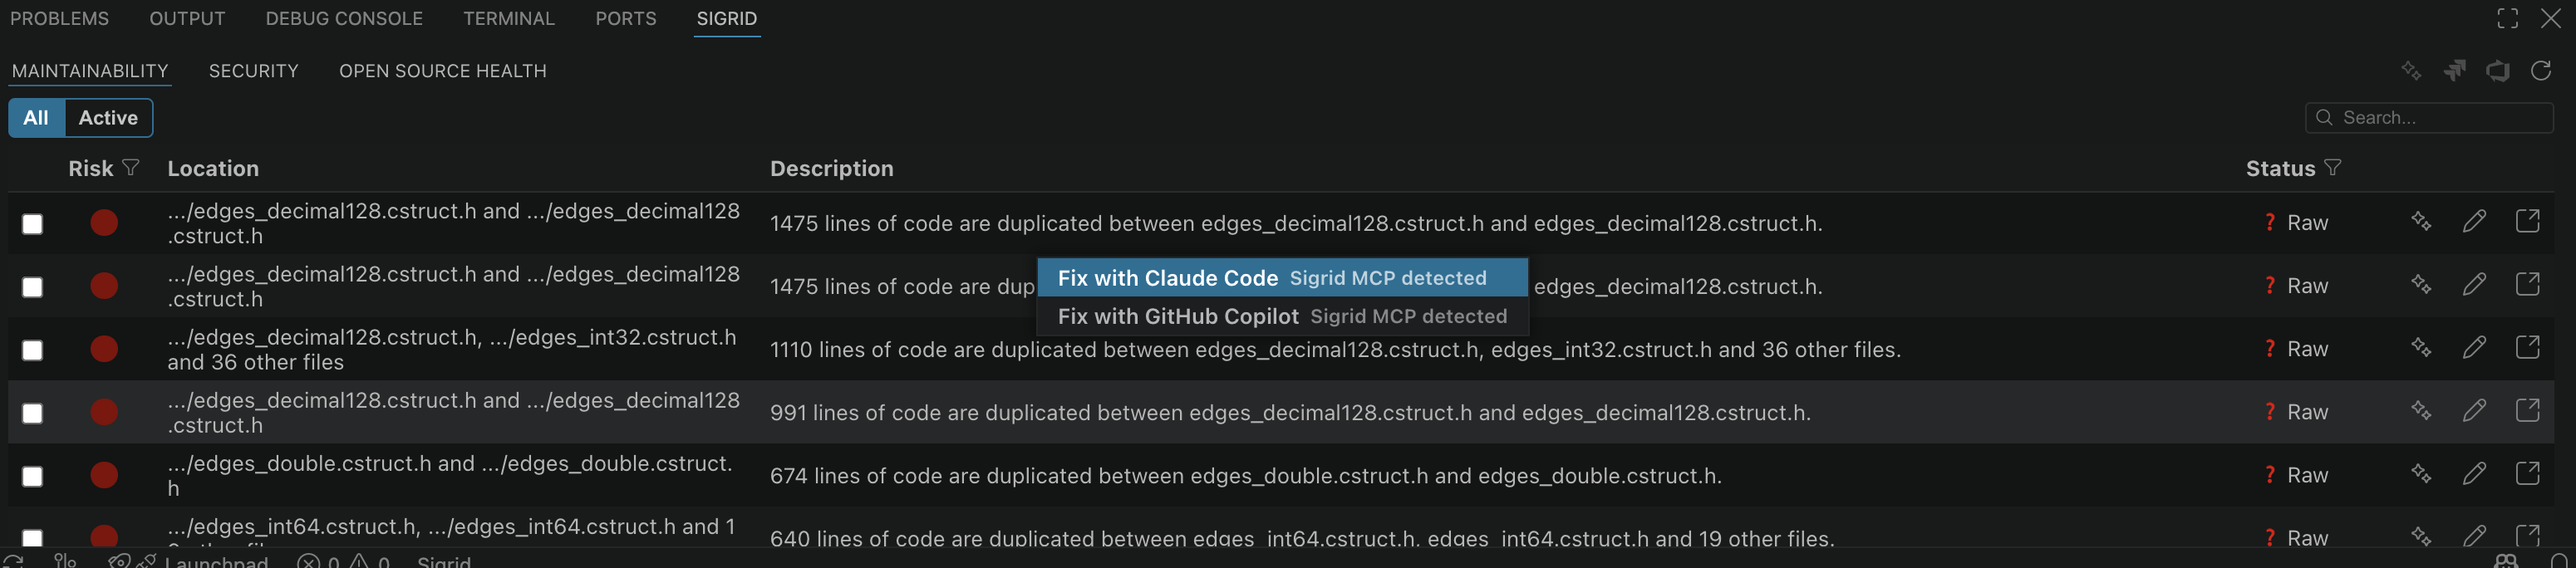
For findings that involve code changes, you can send them directly to an AI coding assistant instead of fixing them by hand. In the findings list, hover over a finding to see two options: “Fix with Claude Code” and “Fix with GitHub Copilot.” Each option shows a small status label, either “Sigrid MCP detected” or “Sigrid MCP not detected,” telling you whether that assistant is already connected to Sigrid in your current setup.
Clicking either option opens that assistant in a new panel, with a message already filled in describing the finding (its risk level, description, and file locations) and an instruction to fix only that finding. If Sigrid MCP is not detected, the assistant still receives this same information and can usually work from it directly, but it won’t be able to look up more context from Sigrid on its own, and a note appears suggesting you install the Sigrid Axis plugin for the best experience.
Getting “Sigrid MCP detected” for GitHub Copilot
Add the Sigrid Axis MCP server in VS Code’s own MCP settings (Cmd+Shift+P → “MCP: Add Server” → HTTP),
pointing to https://sigrid-says.com/mcp (or https://my-sigrid.example.com/mcp on Sigrid On-Premise) with your
Sigrid API token as a Bearer token in the Authorization header. Once GitHub Copilot can see this server, the label
switches to “detected”.
Getting “Sigrid MCP detected” for Claude Code
Install the Sigrid Axis plugin for Claude Code rather than adding the MCP server manually, only the plugin is recognized by this detection check:
/plugin marketplace add Software-Improvement-Group/agent-integrations
/plugin install axis@sigrid
Choose “Install for you (user scope)” so it’s available in every project, not just the current one. After
installing, run /setup once in each repository to tell Claude Code which Sigrid customer and system it
corresponds to, this lets it act on findings instead of just reading them. See
installing Sigrid Axis.
Creating Jira issues from findings
You can create Jira issues directly from Sigrid findings without leaving Visual Studio Code. This is especially useful if your Jira instance is behind a firewall and cannot be reached from Sigrid directly, because the request is made from your IDE, it uses your own network access.
Setting up Jira integration
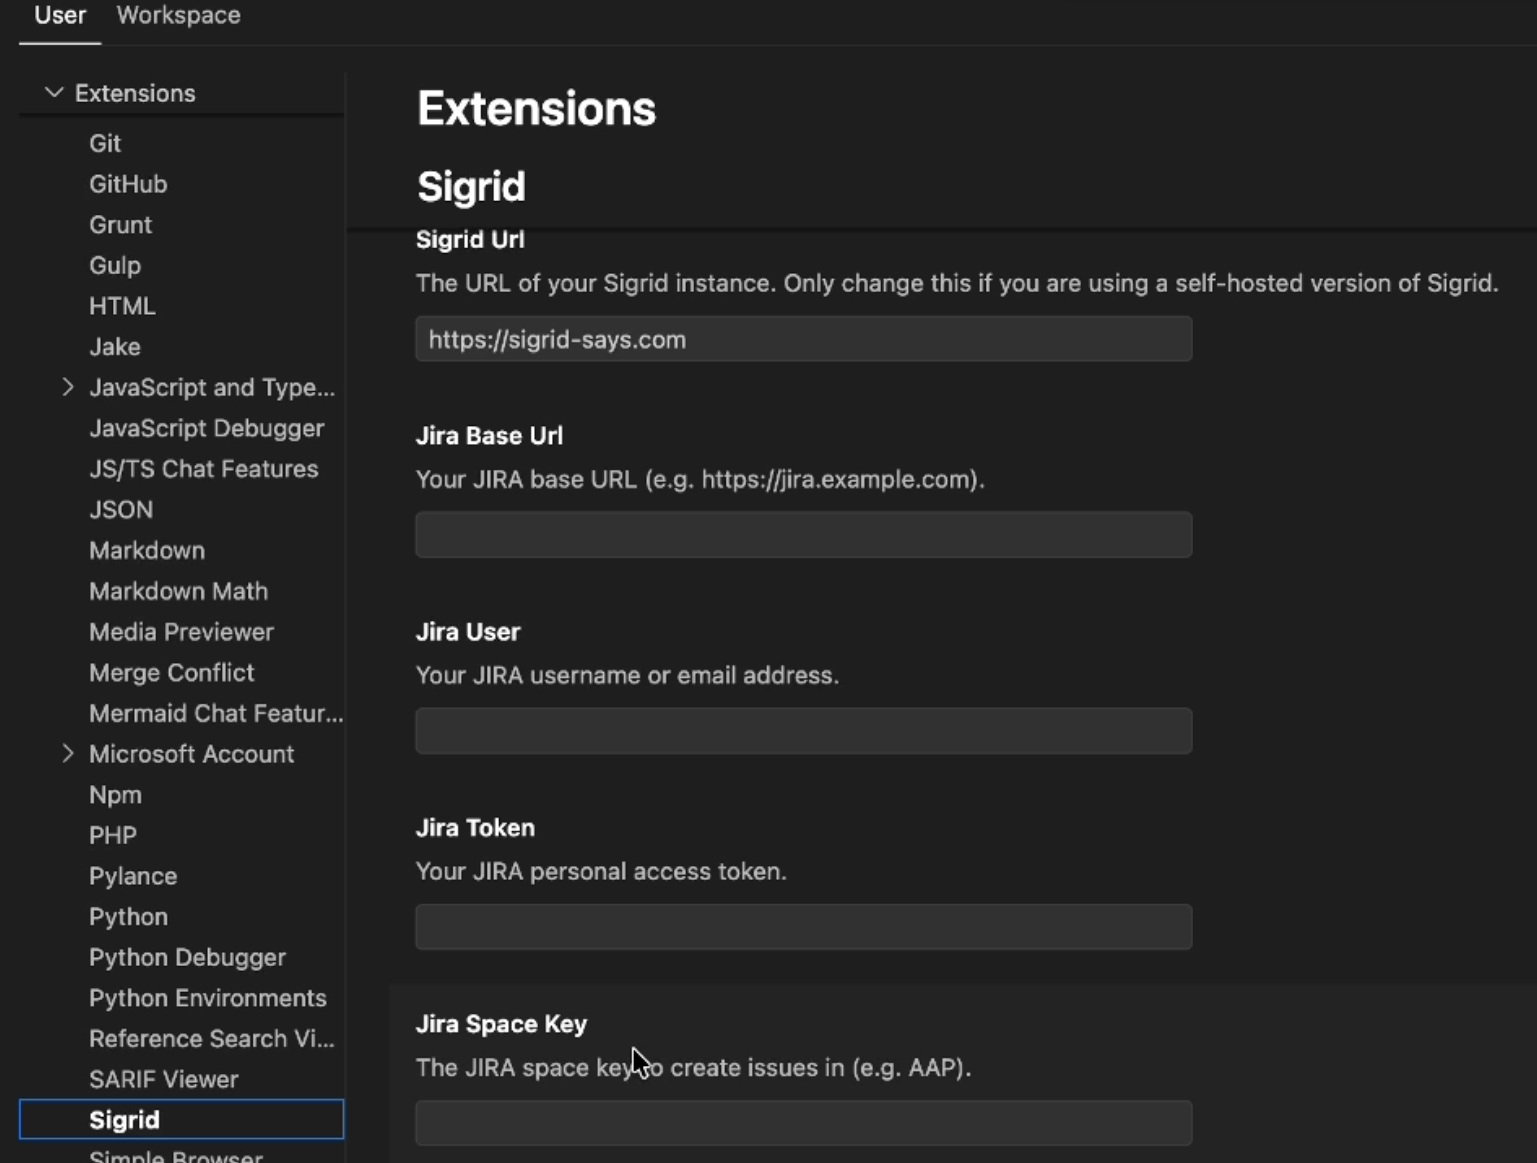
Before you can create issues, you need to configure your Jira credentials. Open VS Code settings (Cmd+,
on Mac, Ctrl+, on Windows), search for “Sigrid”, and scroll down to fill in the following fields:
| Setting | Description | Example |
|---|---|---|
| Jira Base URL | The root URL of your Jira instance | https://jira.example.com |
| Jira User | Your Jira username or email address | j.smith@example.com |
| Jira Token | Your Jira personal access token | (keep this private) |
| Jira Space Key | The key of the Jira project where issues will be created | AAP |
Creating an issue
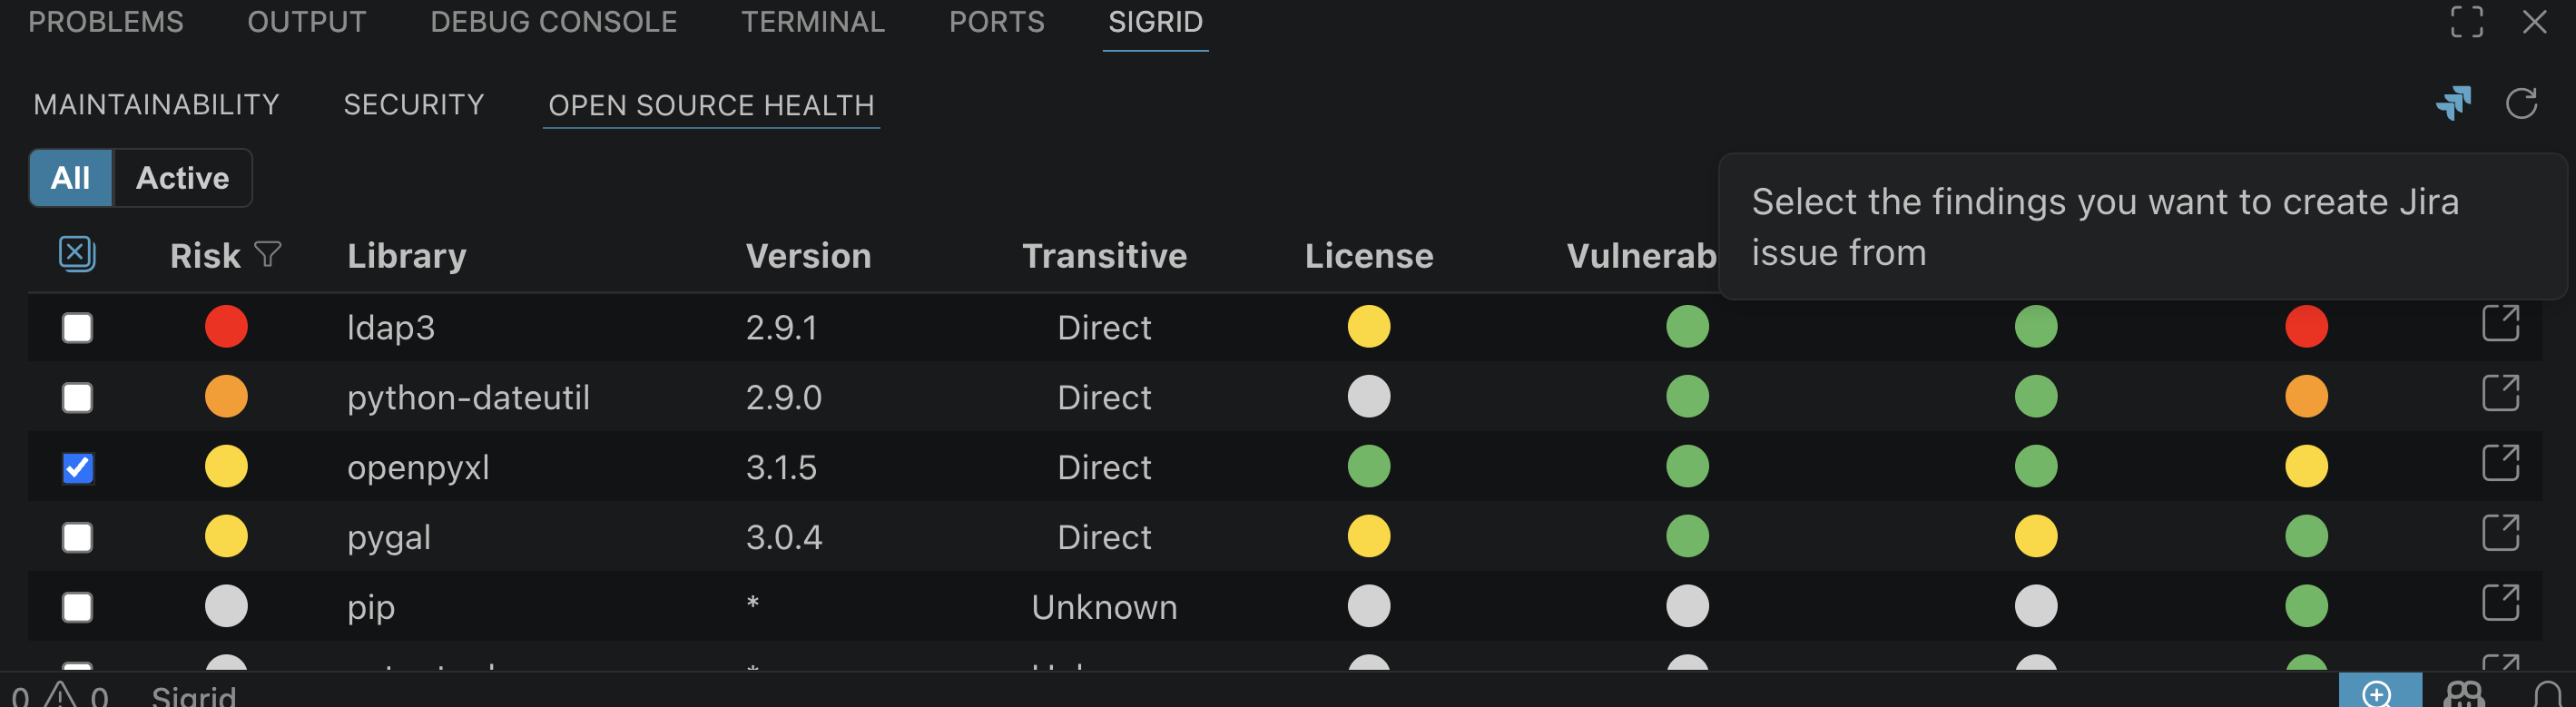
In the findings list, check one or more findings using the checkboxes on the left of each row. You can select findings across different tabs (for example, a mix of Maintainability and Security findings). Once at least one finding is selected, a tooltip appears confirming your selection and the “Create Jira issue” button becomes active above the list.
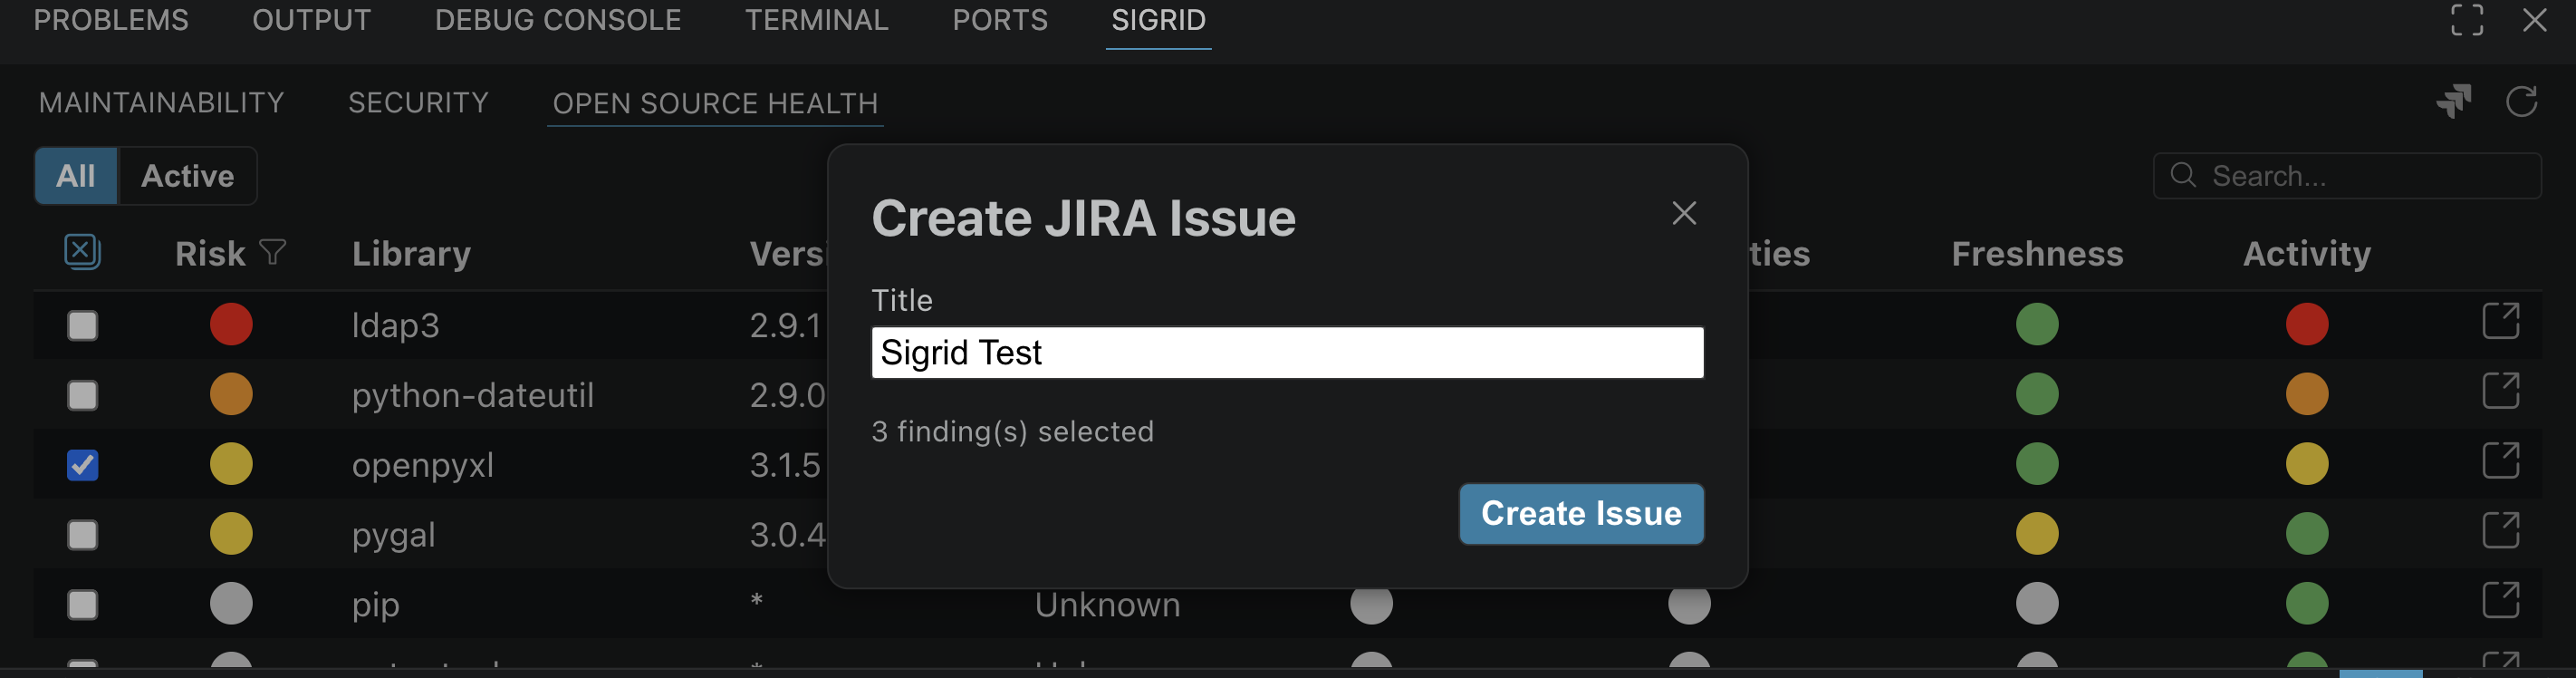
Click the button. A “Create JIRA Issue” dialog appears where you can enter a title for the issue. The dialog also shows how many findings are selected.
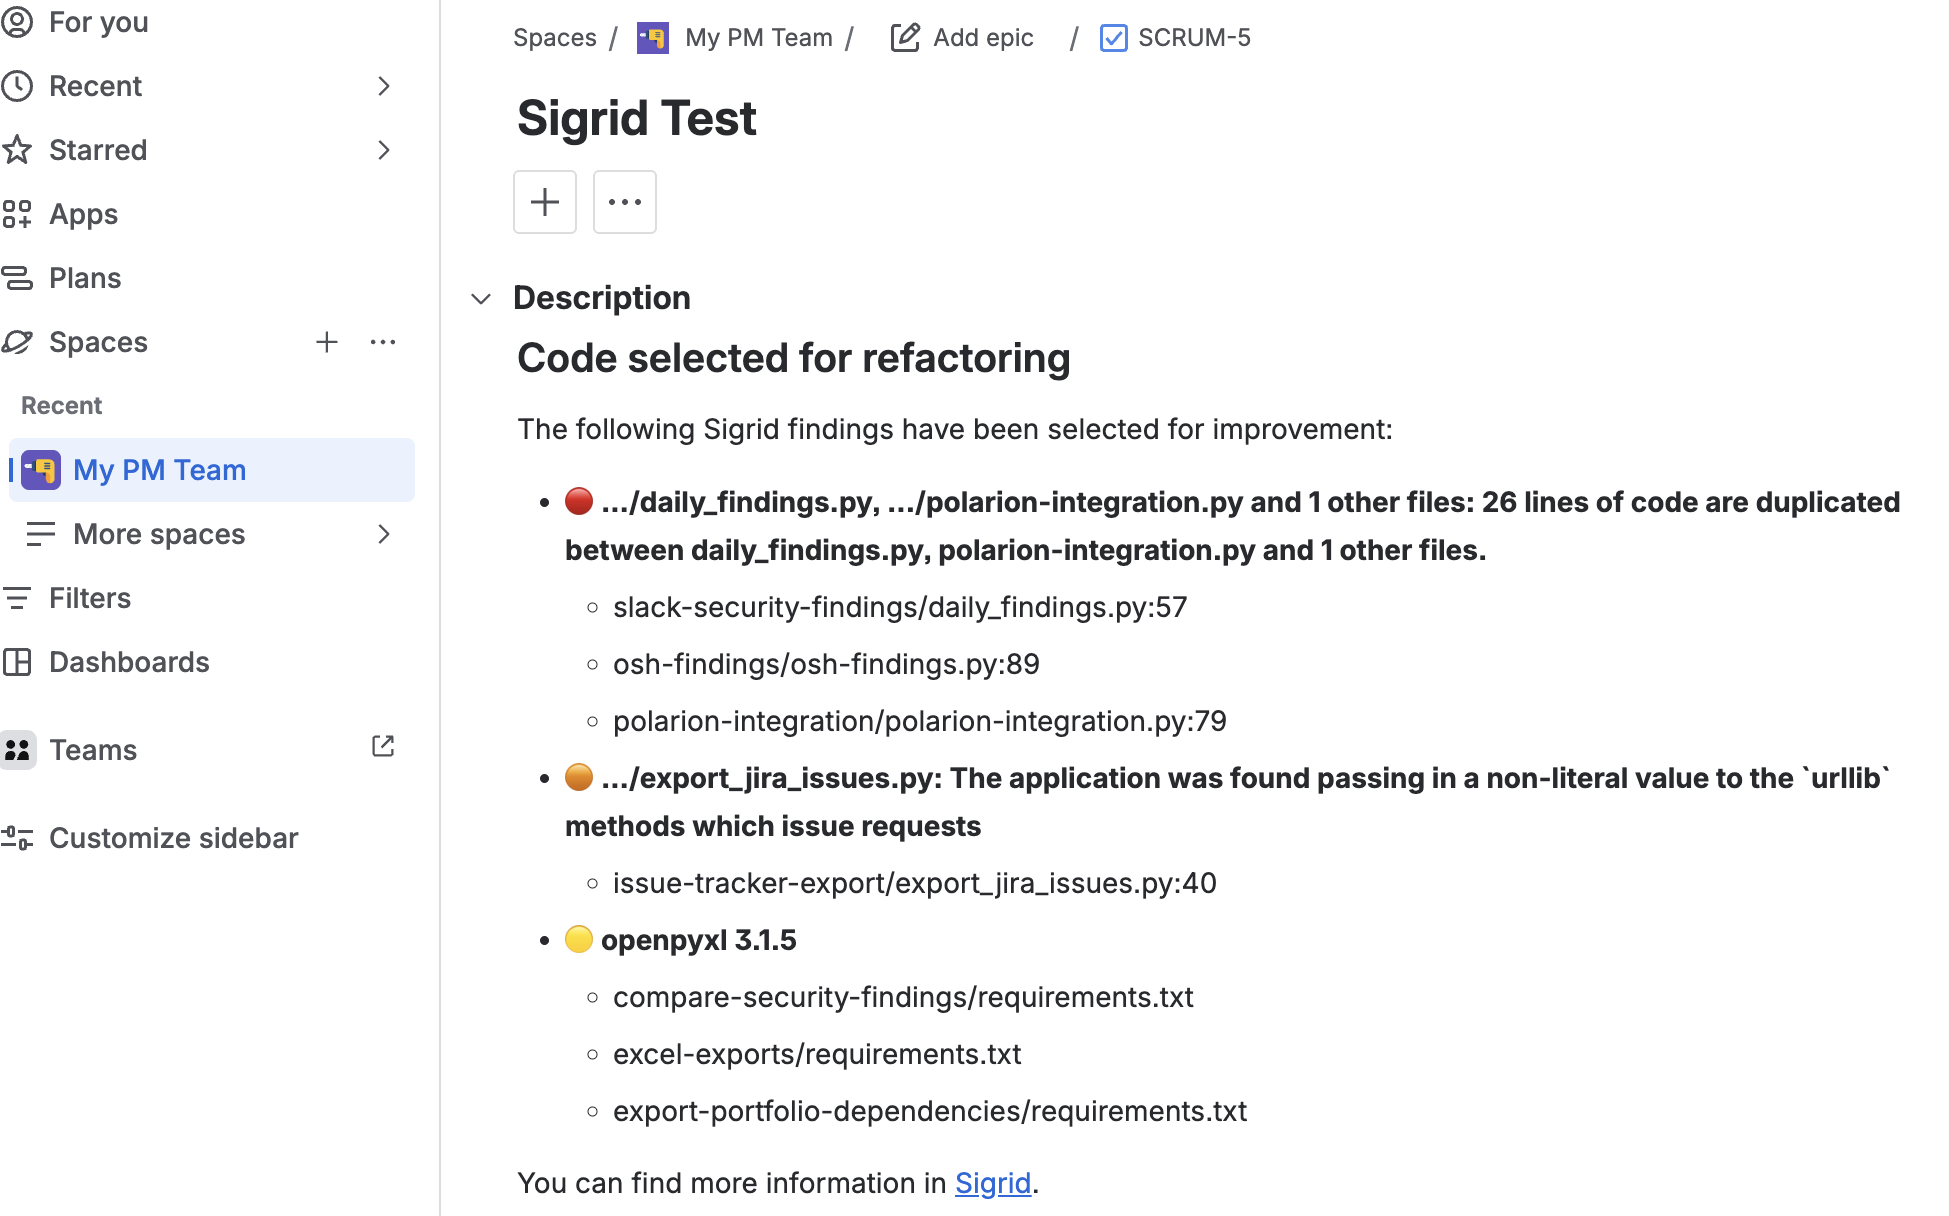
Click Create Issue. The extension calls your Jira instance and creates the issue. A confirmation notification appears at the bottom-right of the panel showing the issue ID (for example, “JIRA issue created: SCRUM-5”) with an “Open in Browser” button to view it directly in Jira.
Creating Azure DevOps work items from findings
As an alternative to Jira, you can create Azure DevOps work items directly from Sigrid findings without leaving Visual Studio Code. As with the Jira integration, the request is made from your own IDE, so this also works if your Azure DevOps organization is behind a firewall and not reachable from Sigrid directly.

Setting up Azure DevOps integration
Before you can create work items, you need to configure your Azure DevOps credentials. Open VS Code settings (Cmd+, on Mac, Ctrl+, on Windows), search for “Sigrid”, and scroll down to fill in the following fields:
| Setting | Description | Example |
|---|---|---|
| Azure DevOps Organization URL | The URL of your Azure DevOps organization | https://dev.azure.com/yourorganization |
| Azure DevOps Personal Access Token | A personal access token with Work Items (Read & write) scope | (keep this private) |
| Azure DevOps Project Name | The name of the Azure DevOps project where work items will be created | SigridTest |
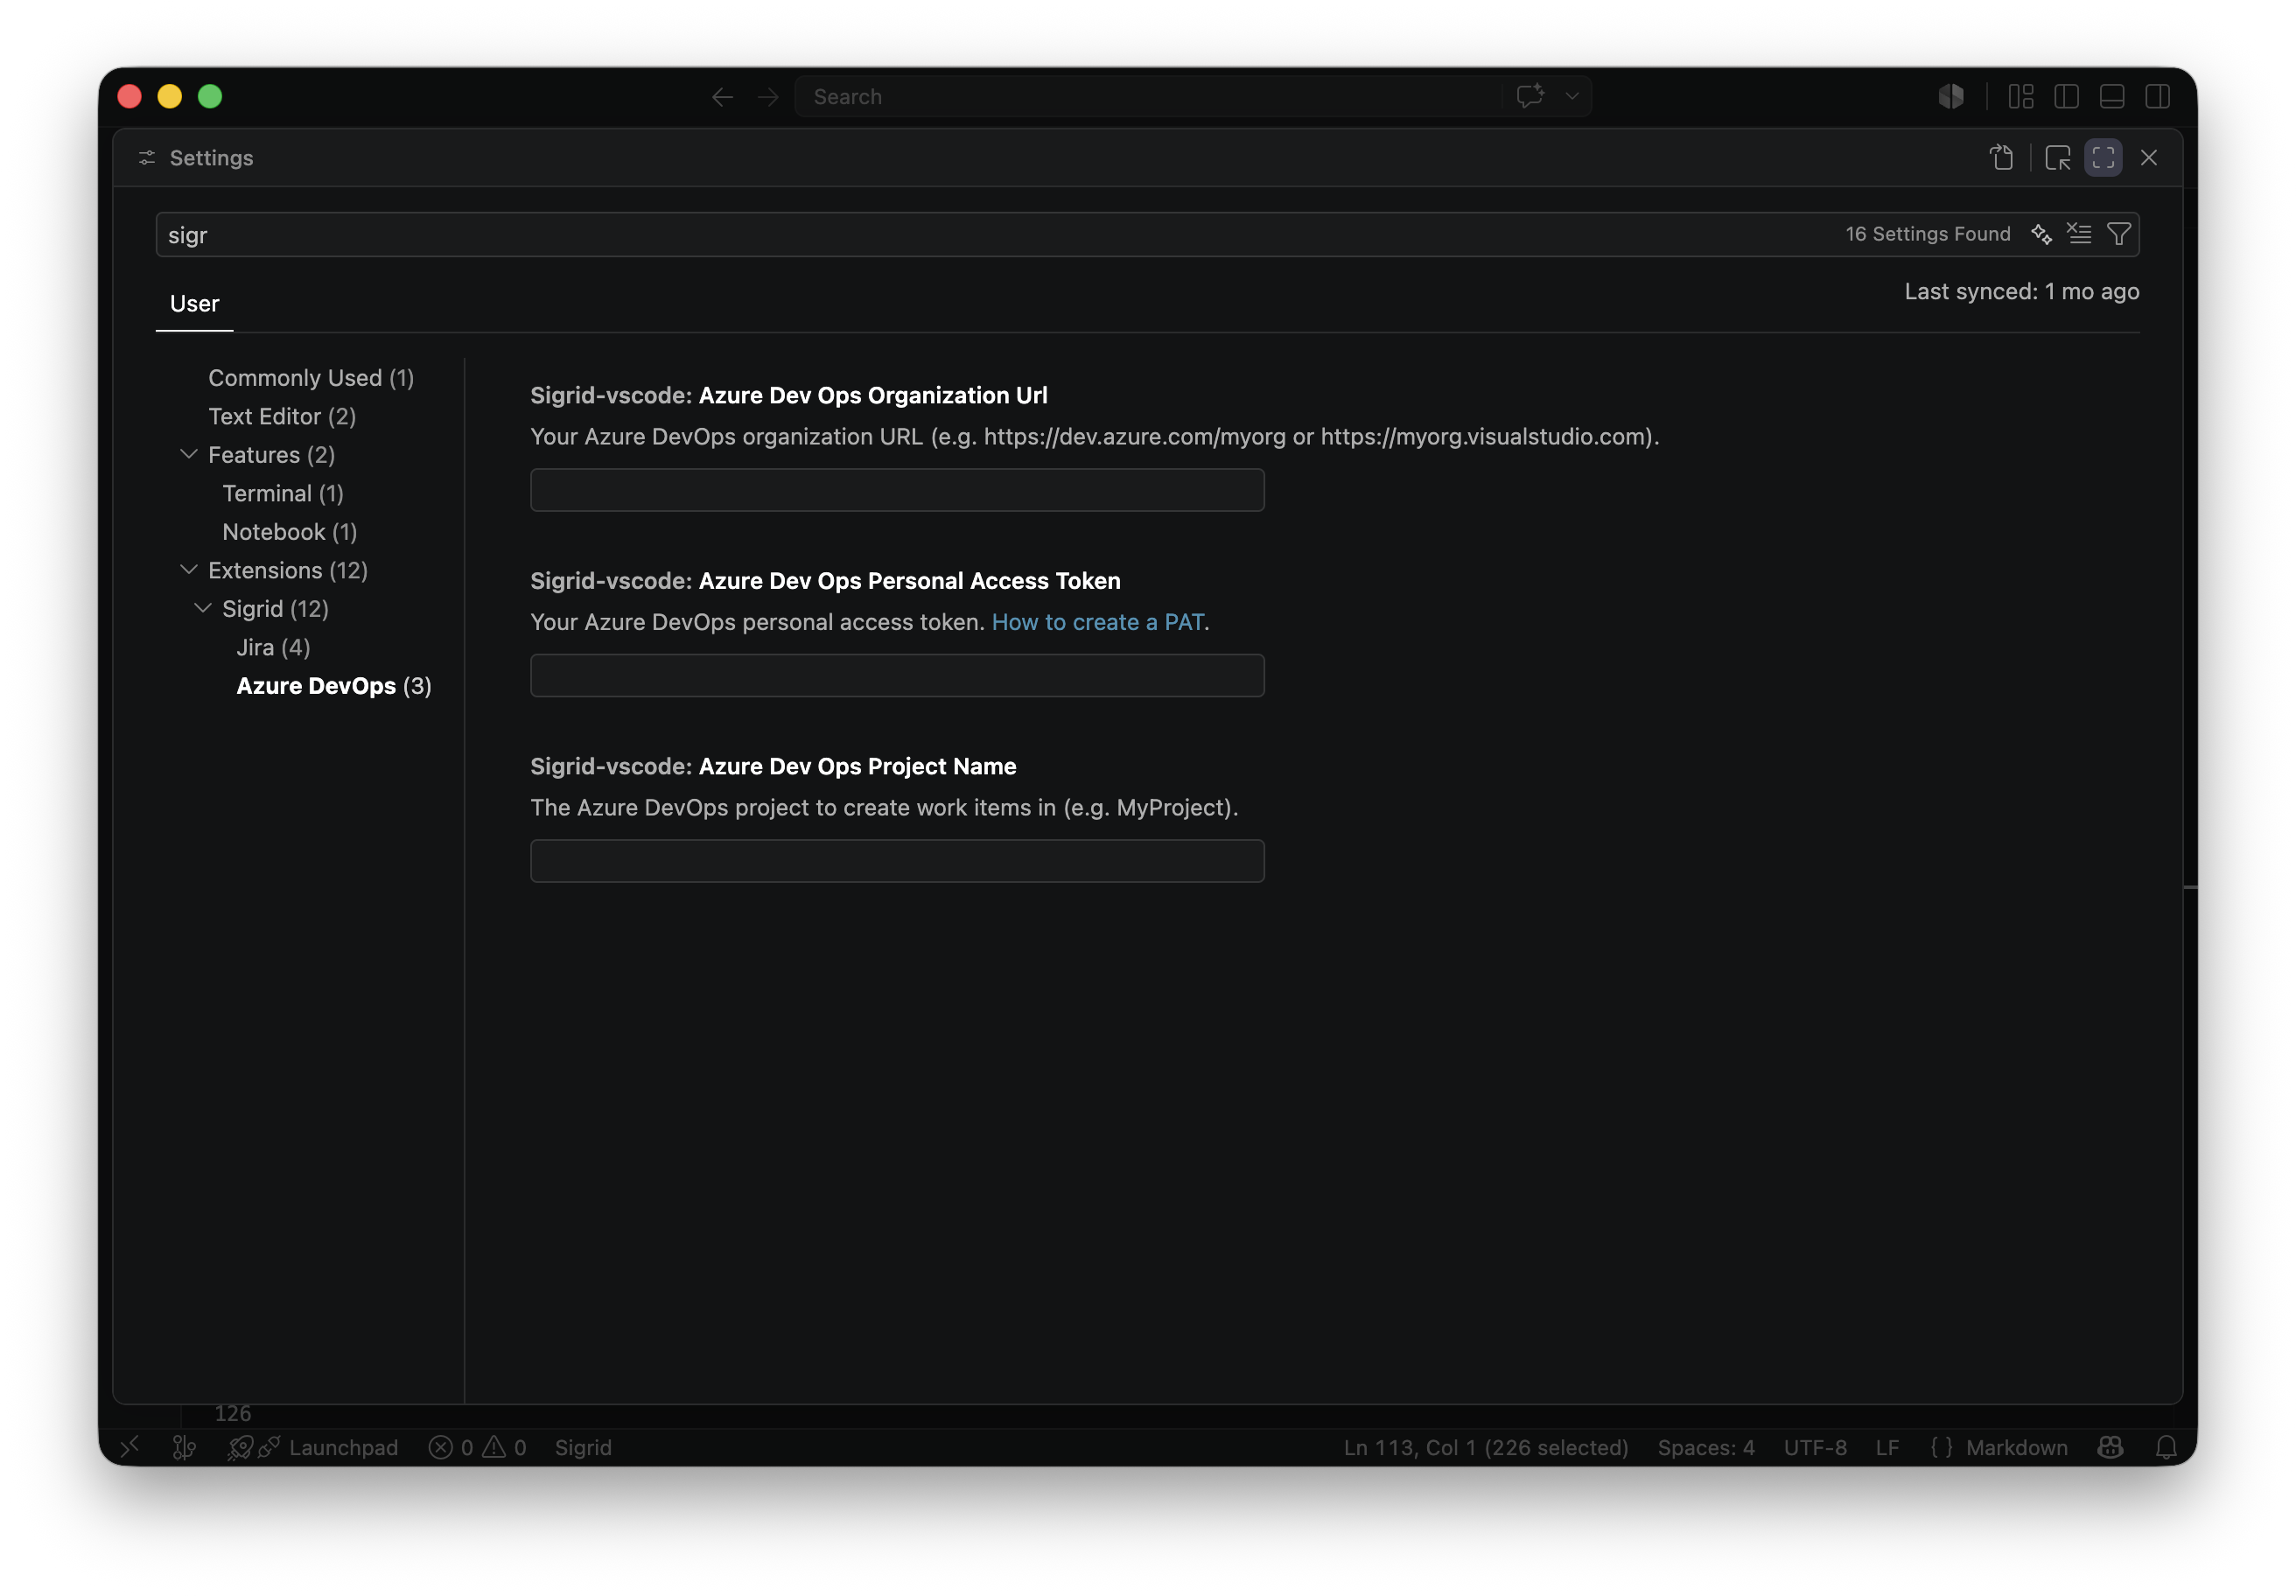
You can generate a personal access token from your Azure DevOps organization under User settings > Personal access tokens > New Token.
Creating a work item
Select one or more findings using the checkboxes in the findings list, the same way you would for a Jira issue. With at least one finding selected, use the “Create Azure DevOps work item” button above the list.

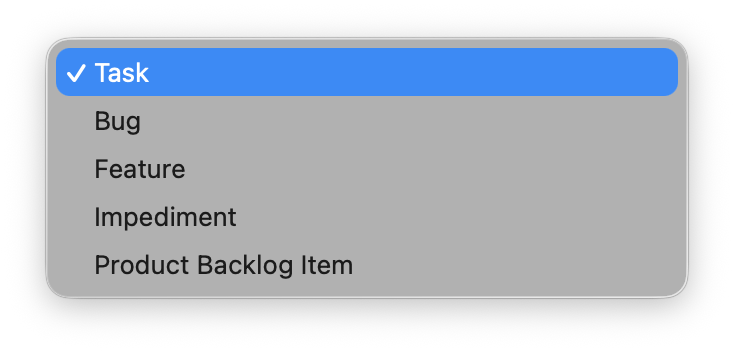
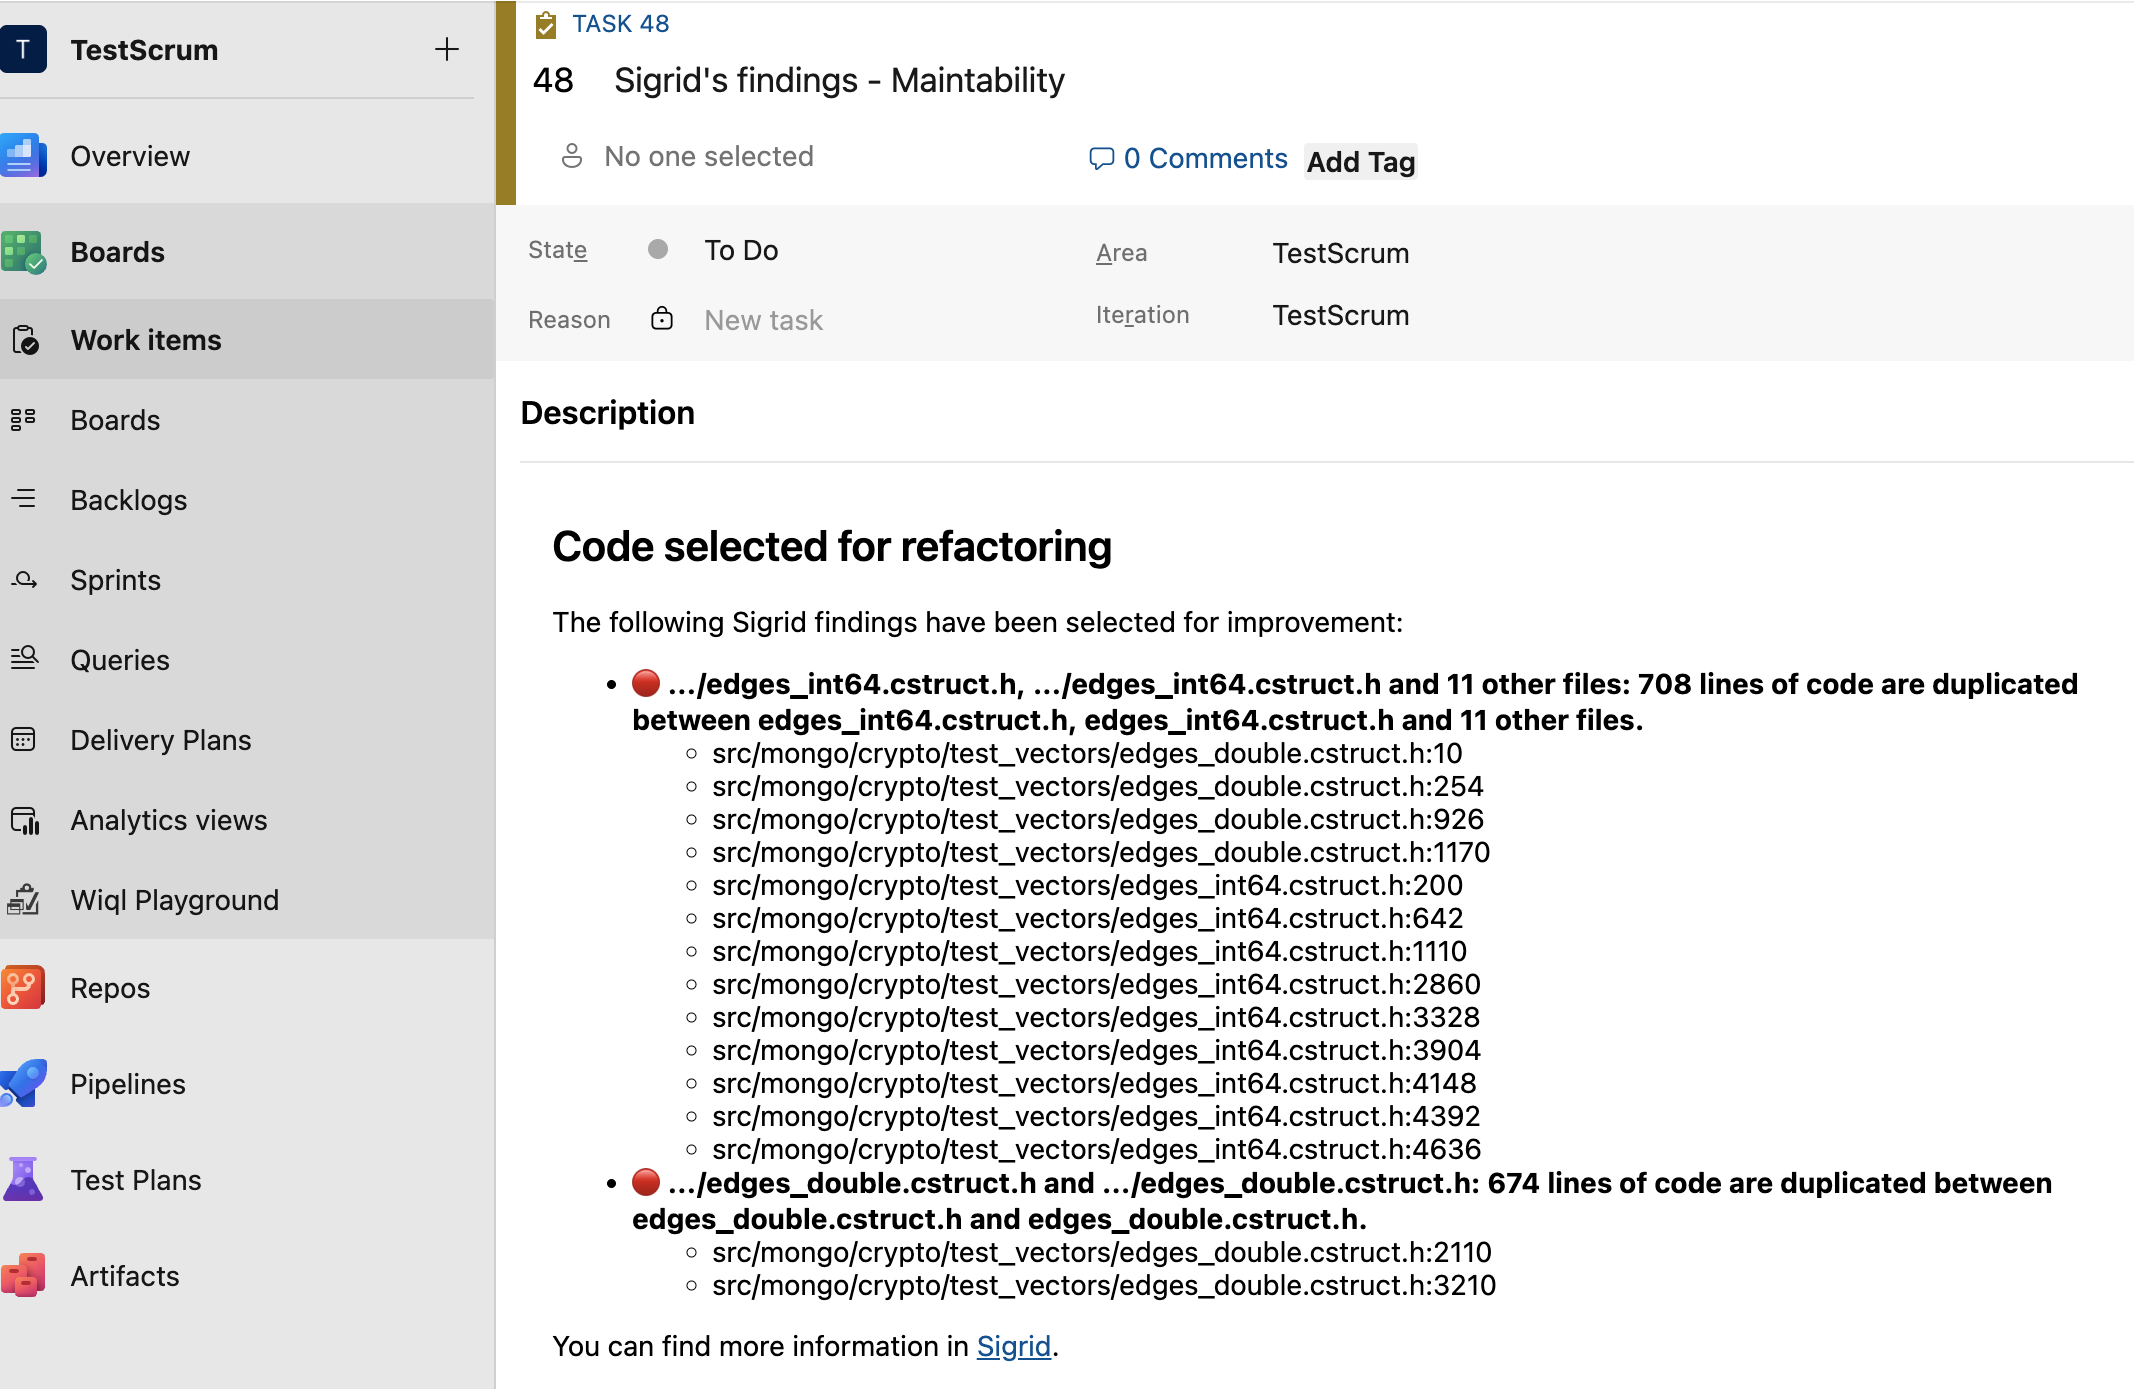
A dialog opens where you can enter a title and choose the work item type from a dropdown. The available types depend on the process template your Azure DevOps project uses — for example, a Scrum project offers Task, Bug, Feature, Impediment, and Product Backlog Item. The extension automatically generates a description that lists the selected findings and links back to each finding in Sigrid. Some work item types support an additional Repro Steps field; the extension detects whether this field is available for the type you chose and includes it automatically when supported.
Click Create. The extension calls your Azure DevOps organization and creates the work item. A confirmation notification appears showing the work item ID, with a link to open it directly in Azure DevOps.
Contact and support
Feel free to contact SIG’s support team for any questions or issues you may have after reading this documentation or when using Sigrid.